

Conference & Lecture Interpretation
Event Booking (Fixed QR)
Create a fixed QR and URL before the event and hand it to the audience in advance.
Based on the September 2026 build · click any screenshot to enlarge.
※ Click any screenshot to enlarge.
1
Open Event Booking
Create the QR and URL before the event — the address stays the same even if you stop and restart interpretation.
- 1Click [Event booking] at the top of the app.
- 2Click the blue [Book] link on the right of the dialog.
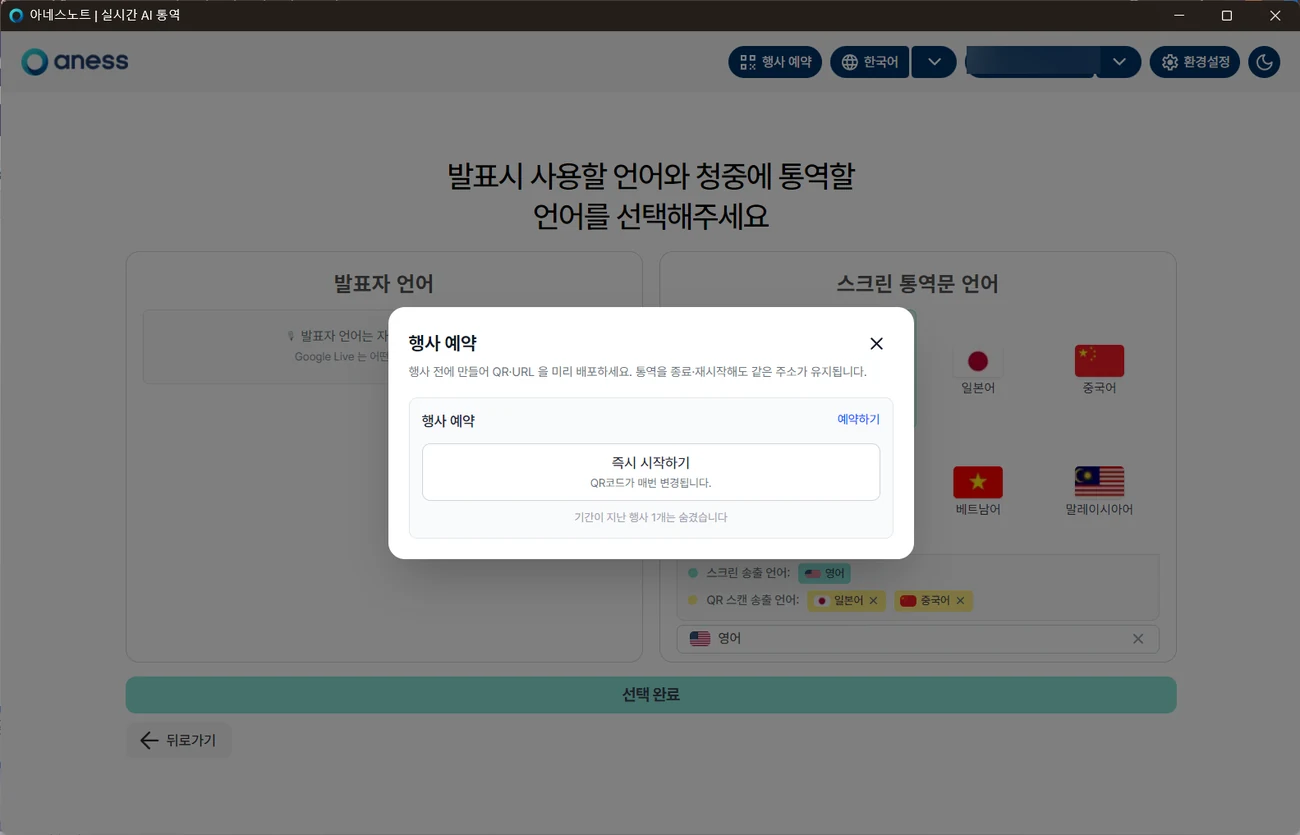 12
[Book] and [Start now] are not the same
| Button | QR / URL address | When to use it |
|---|---|---|
| Book | Fixed per event. Stopping and restarting keeps the same address. | When you will print or hand out the QR / URL before the event |
| Start now | Changes every time you start. | One-off use right now — an internal demo, for example |
CarefulIf the QR is going on printed material, always create it with [Book]. If you start with [Start now], the printed QR will not connect — and there is no way back on the day.
2
Create the event
Set a name, a date and an interpretation engine to create a fixed QR room.
- 1Enter the event name.
- 2Pick the event date — tick [Multi-day event] if it runs over several days.
- 3Choose the engine — anessNote 2.0 (glossary support) or anessNote 3.0 (audio on the audience’s phones).
- 4Click [Create].
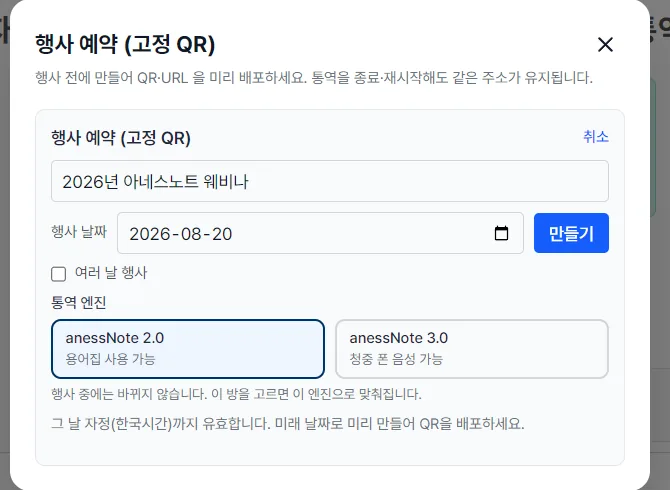 1234
NoteThe engine cannot be changed during the event — choosing this room locks it in.
The room is valid until midnight KST on the event date, so create it ahead of time and hand out the QR.
The room is valid until midnight KST on the event date, so create it ahead of time and hand out the QR.
NoteChoosing anessNote 3.0 means the glossary will not apply. Pick 2.0 when speaker names, product names and jargon matter; pick 3.0 when the audience needs to listen through earphones. The full comparison is in Conference & Lecture ▸ 2. Choose the engine.
3
Share the QR and URL
Put the address on your signage, banners and invitations in advance.
- 1The event appears in the list with its code, date and connection status.
- 2Use [Copy URL] and share the address.
- 3Adjust the validity with [Period], or remove it with [×].
- 4The top button now shows the event name — starting interpretation connects to this room.
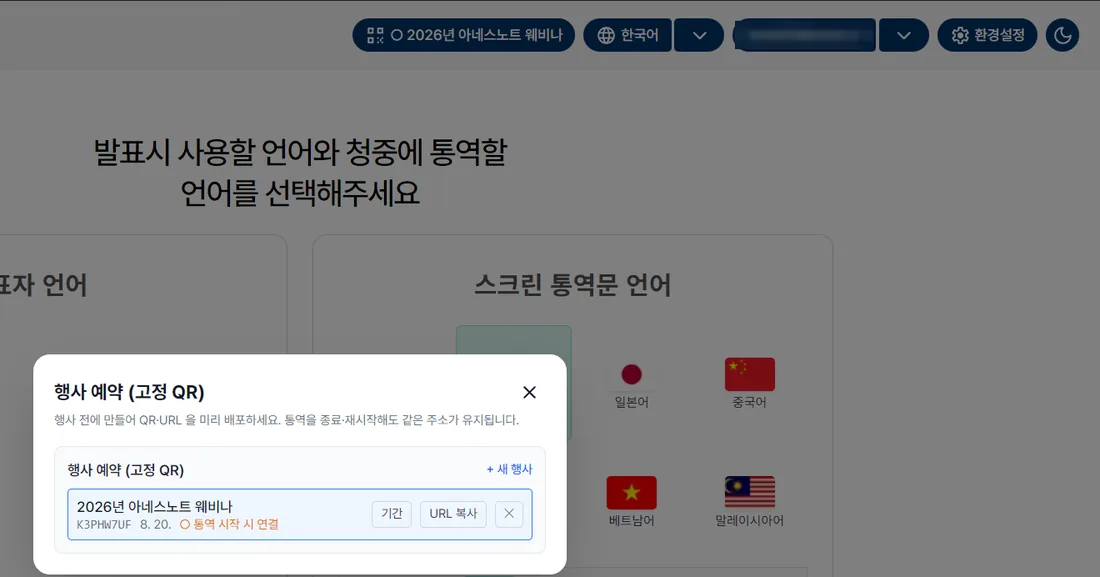 4123
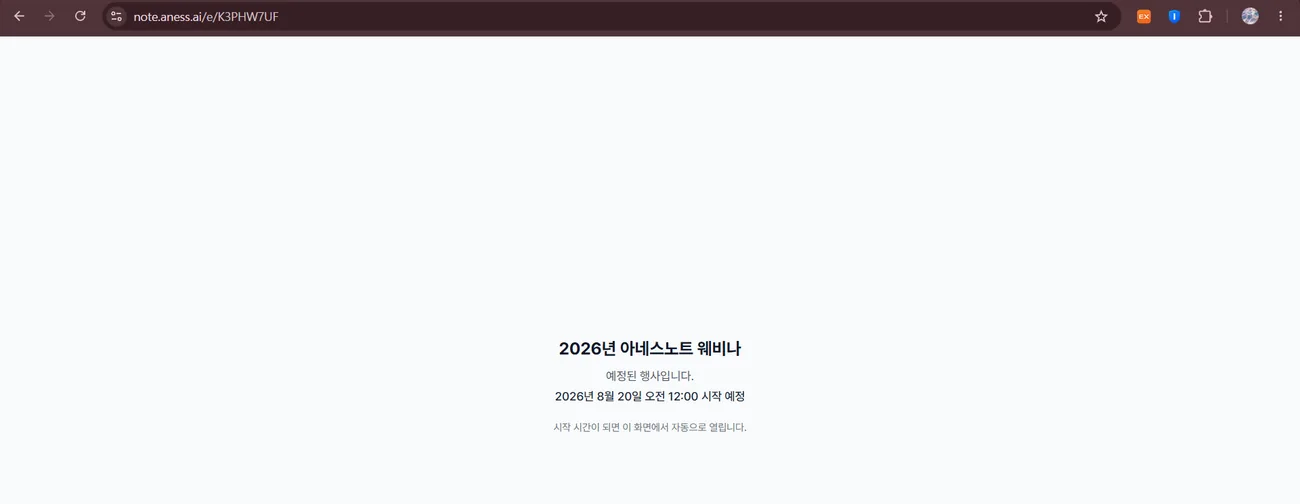 12
NoteIf the audience opens the link early they see a “scheduled event” holding screen, which switches to the live translation automatically when the session starts.
4
Checklist for the day
Seven things to confirm before you go on.
- 1The QR / URL is already out there — leaflets, banners, invitations, the venue slide.
- 2The audience notice is ready to show on the venue screen (file in step 5 of the audience tab).
- 3The engine matches the booked event — it must be 3.0 if you need audio.
- 4You picked the monitor for subtitles — Subtitle settings ▸ Display monitor, or Alt + M.
- 5You tried each shortcut once in rehearsal — especially Alt + C (clear) and Alt + S (hide).
- 6Your audience notice mentions turning off silent mode and bringing earphones — if you use audio.
- 7For a multi-day event, [Multi-day event] is ticked.
NoteAn event code is valid until midnight (KST) on the event date. Morning and afternoon sessions on the same day can share one QR.
Past midnight, create a new event or use [Multi-day event].
Past midnight, create a new event or use [Multi-day event].