

User Manual
Conference & Lecture Interpretation
From installing the desktop app to running the session, fixing subtitles live and reviewing the record.
Based on the September 2026 build · click any screenshot to enlarge.
Watch the video guideWalk-through of conference and lecture interpretation↗※ Click any screenshot to enlarge.
Install the desktop app
Conference and lecture interpretation runs on the Windows desktop app.
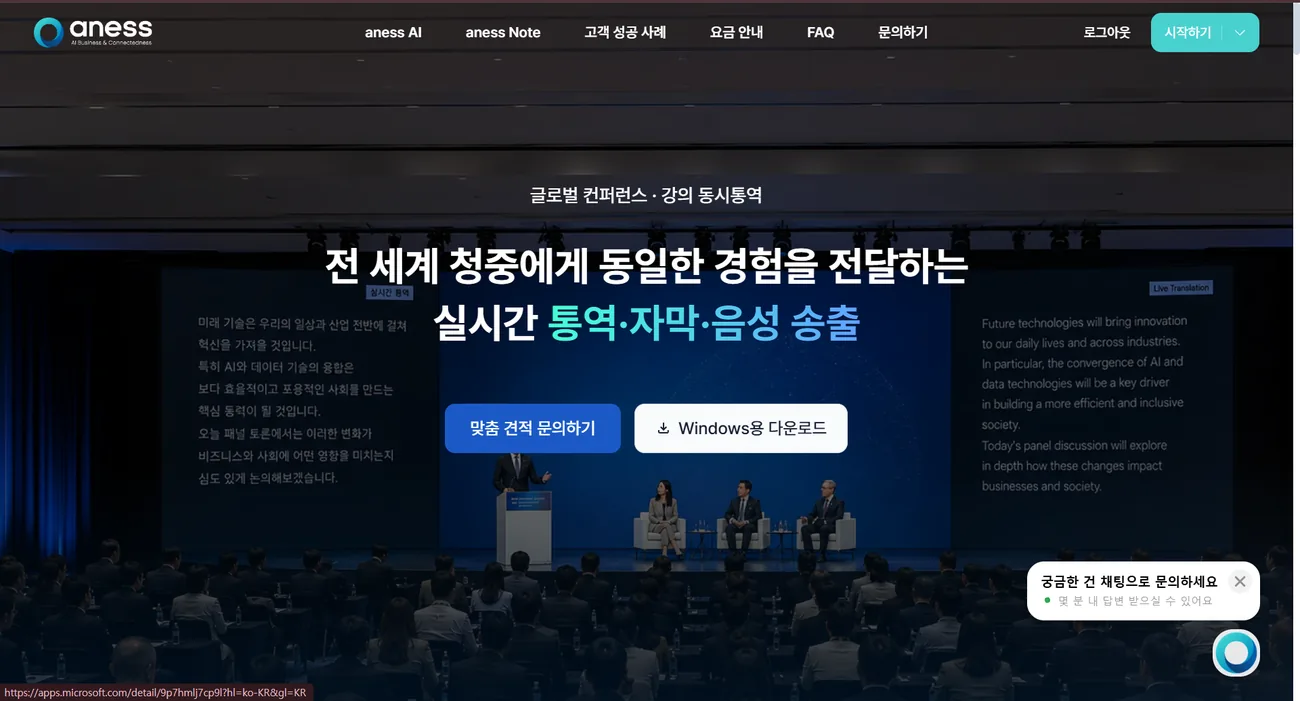
- 1Go to aness.ai/conference and click [Download for Windows].
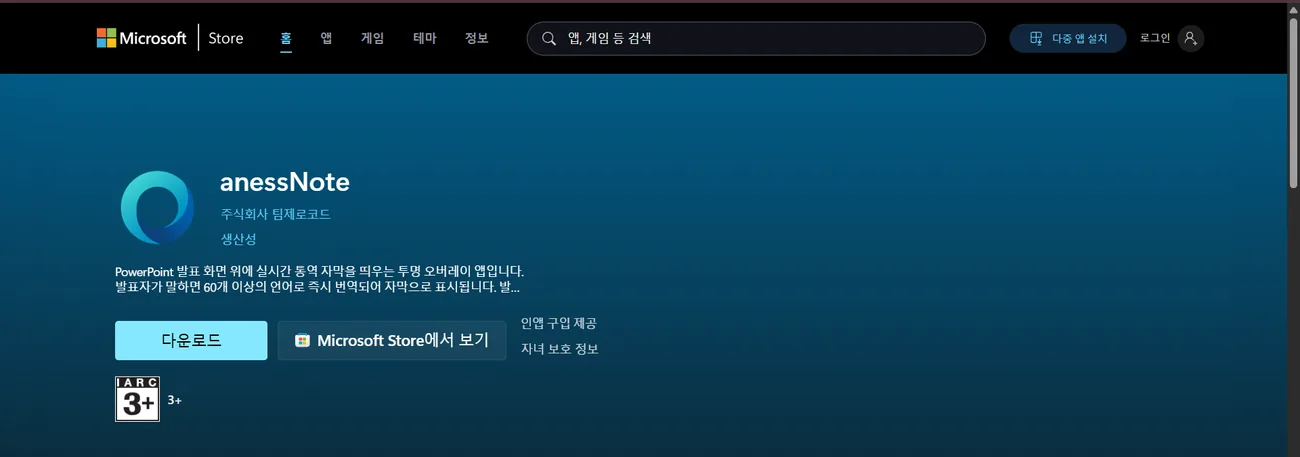
- 2On the Microsoft Store web page, click [Download].
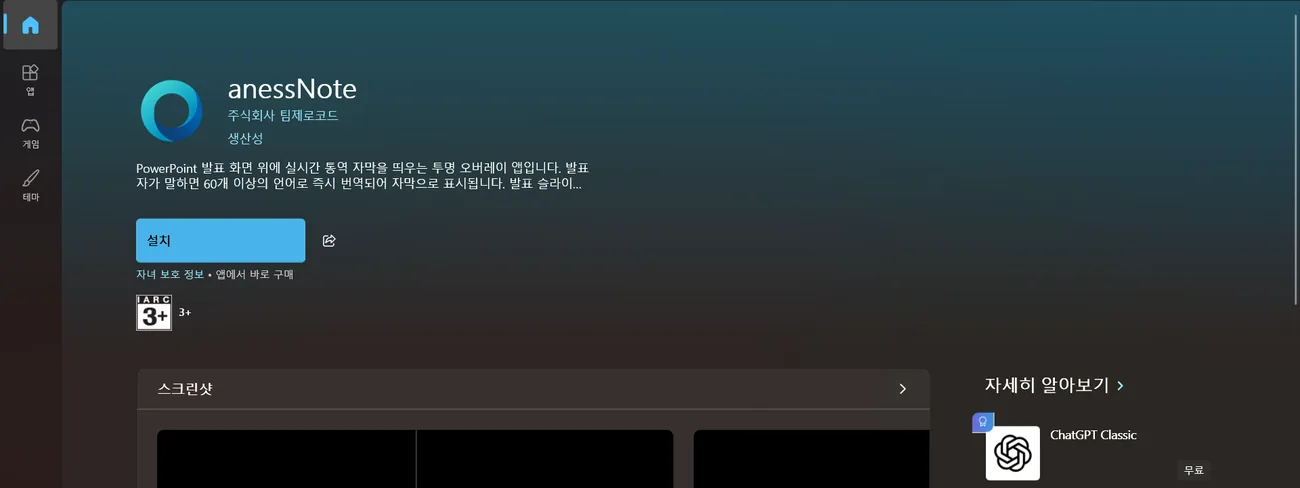
- 3When the Microsoft Store app opens, click [Install], then [Open] when it finishes.
 1
 2
 3
Choose the interpretation engine (2.0 / 3.0)
Your choice decides whether the glossary and audience audio (TTS) are available. Settle it before the event.
| What | anessNote 2.0 | anessNote 3.0 |
|---|---|---|
| Speaker language | You pick it yourself. | Detected automatically — there is no selector. |
| Accuracy | Higher. | Standard. |
| Response speed | Standard. | Faster. |
| Glossary | Available | Not available |
| Audience audio (TTS) | No — text only. | Yes — a [Voice] button appears on the audience screen. |
| Default | This is the default. | You have to select it. |
- 1For academic or technical events full of jargon and proper nouns, choose 2.0 — the glossary moves quality more than anything else.
- 2If the audience needs to listen through earphones, choose 3.0 — audio playback (TTS) works only on 3.0.
- 3If you need both, take 2.0 and cover the audio side with printed guidance instead.
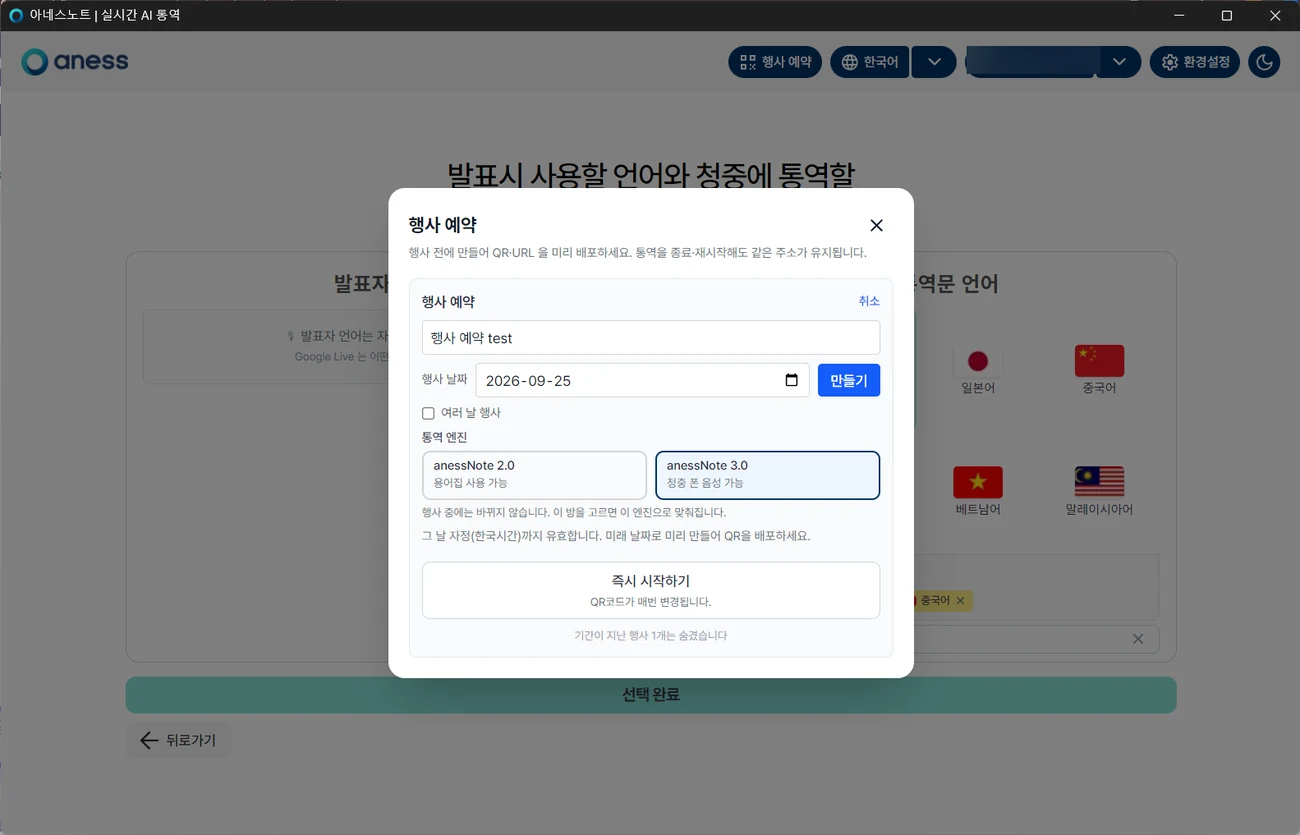
The engine is set in two places
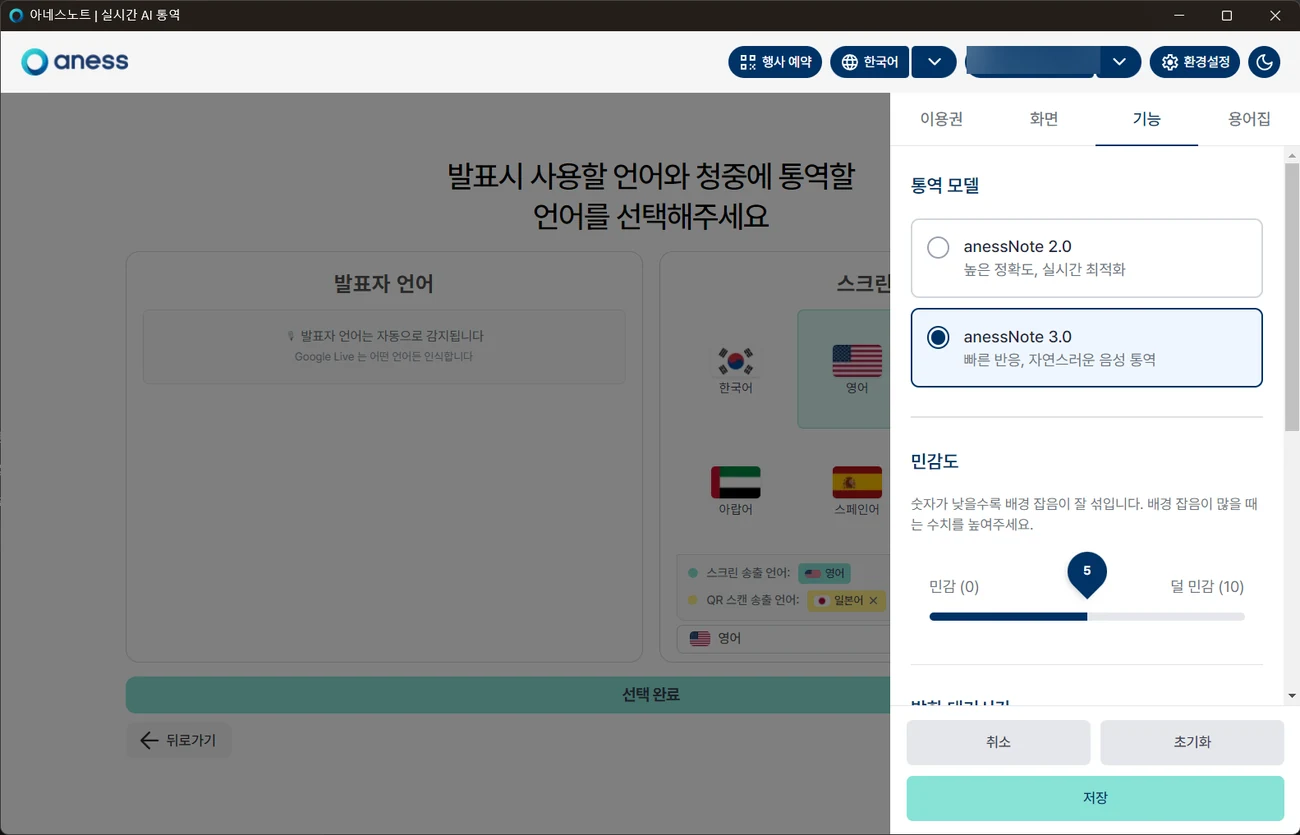
- 1Settings ▸ Features ▸ Interpretation model — your everyday default.
- 2Event booking ▸ New event ▸ Engine — applies to that event only and cannot be changed once the event starts.
- 3When you start from a booked event, the event’s engine wins. Keeping both the same avoids surprises.
 123
 4
If either one is 2.0, the [Voice] button will not appear on the audience screen.
Log in and choose the languages
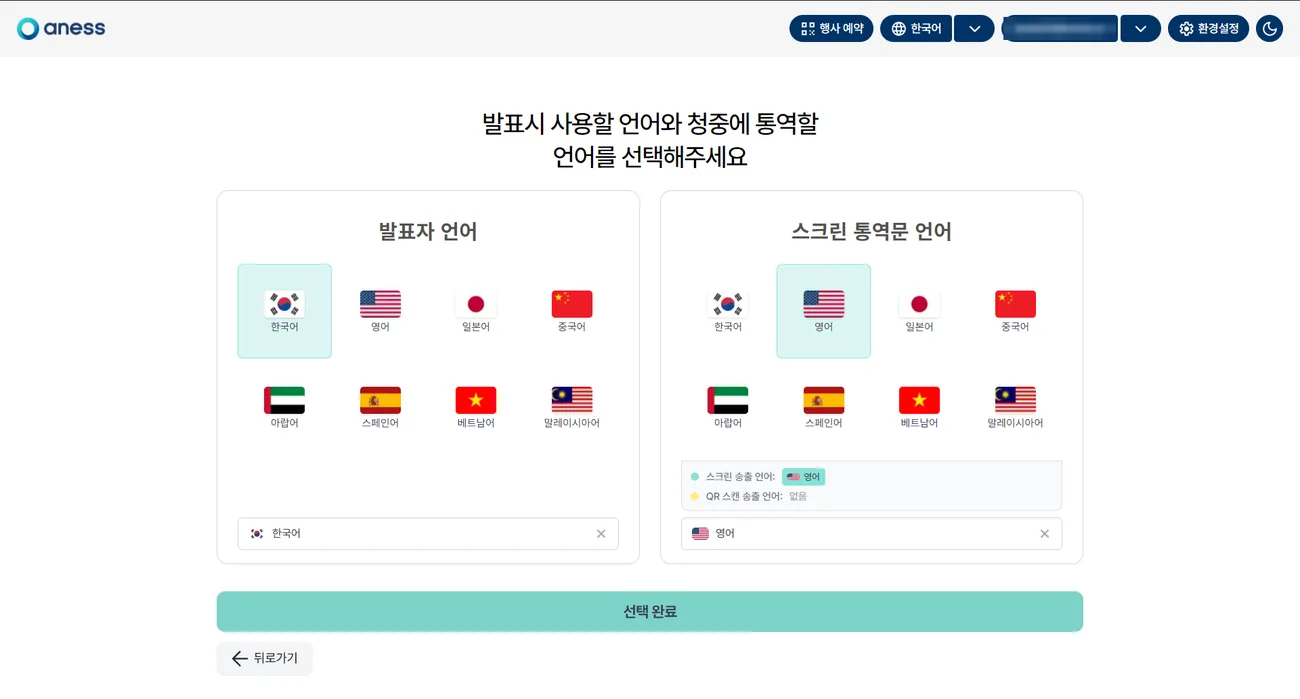
Pick the language the speaker uses and the language shown on screen.
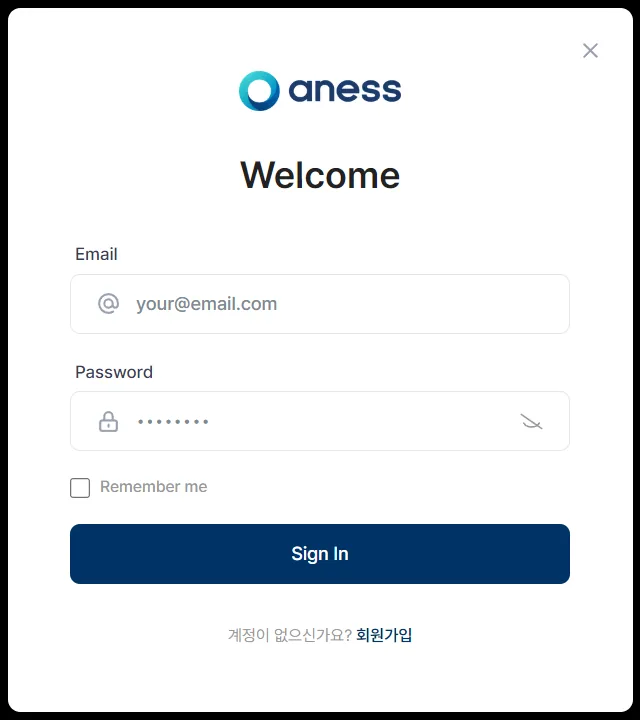
- 1Click [Log in] at the top right, enter your email and password, then [Sign In].
- 2Speaker language — the language the presenter speaks.
- 3Screen subtitle language — the language shown on screen.
- 4Click [Done].
 1
 234
Extra languages for the QR screen
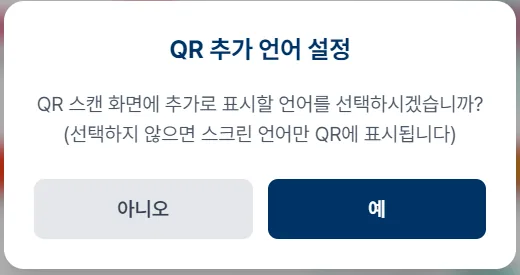
- 1After [Done], the Extra QR languages dialog appears.
- 2[Yes] — pick additional languages the audience can read via QR.
- 3[No] — only the screen language appears on the QR page.
 123
On anessNote 3.0 you do not pick the speaker language
- 1With 3.0, the Speaker language box on the left turns into a notice — “The speaker’s language is detected automatically.” There is nothing to choose.
- 2Pick the screen interpretation language exactly as on 2.0 — this is what goes on the venue screen.
- 3The QR scan languages chips below list what the audience can open by QR.
A language missing here will not appear on their tabs either.
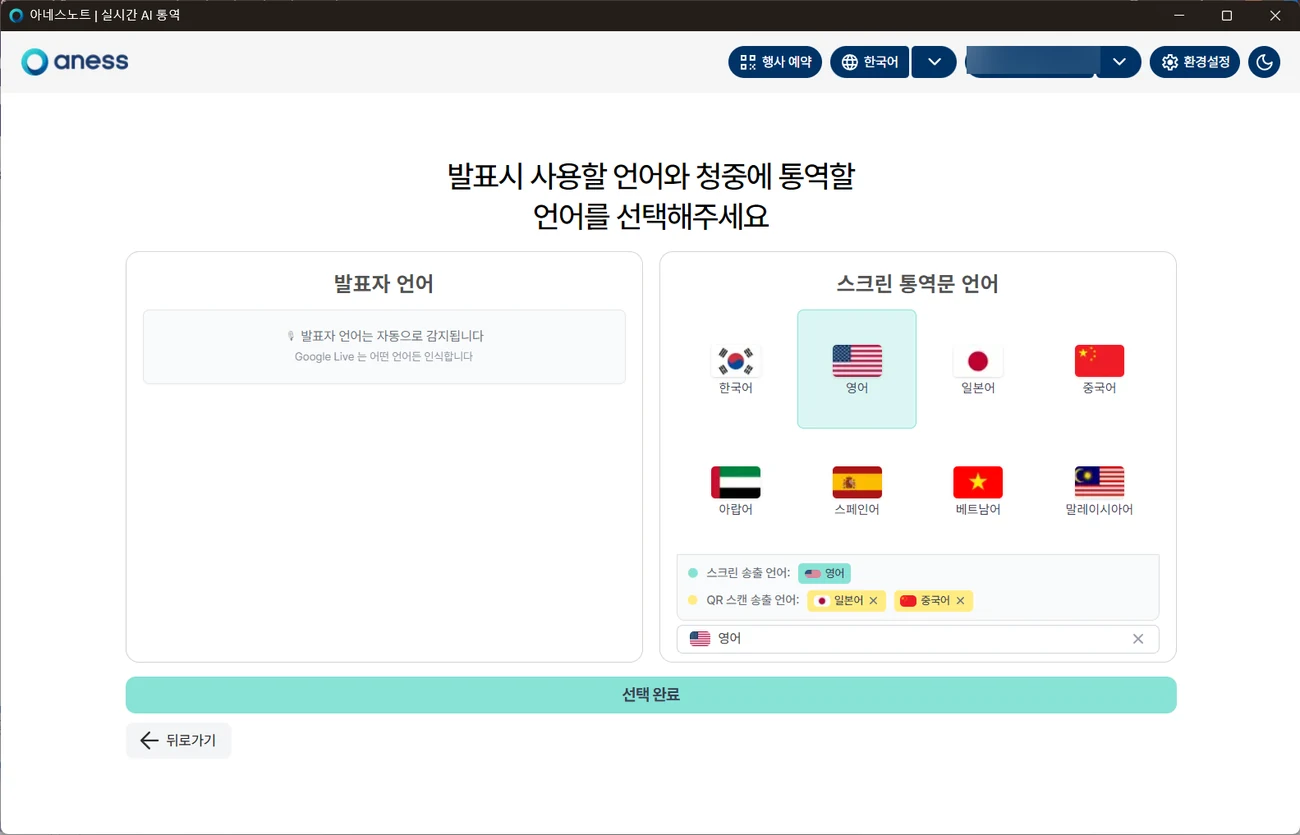 12
Run the simultaneous interpretation
The transcript and translation build up live, and subtitles overlay the presentation screen.
- 1When [Start speaking] appears, begin — the transcript and translation appear in real time.
- 2Use A- / A+ at the top left to resize the subtitles (20 px by default).
- 3The Other languages QR on the right lets the audience read the translation on their phones. [Enlarge QR] blows it up.
- 4Check Remaining time for the interpretation minutes left.
- 5Subtitles are drawn as a transparent overlay on top of the presentation.
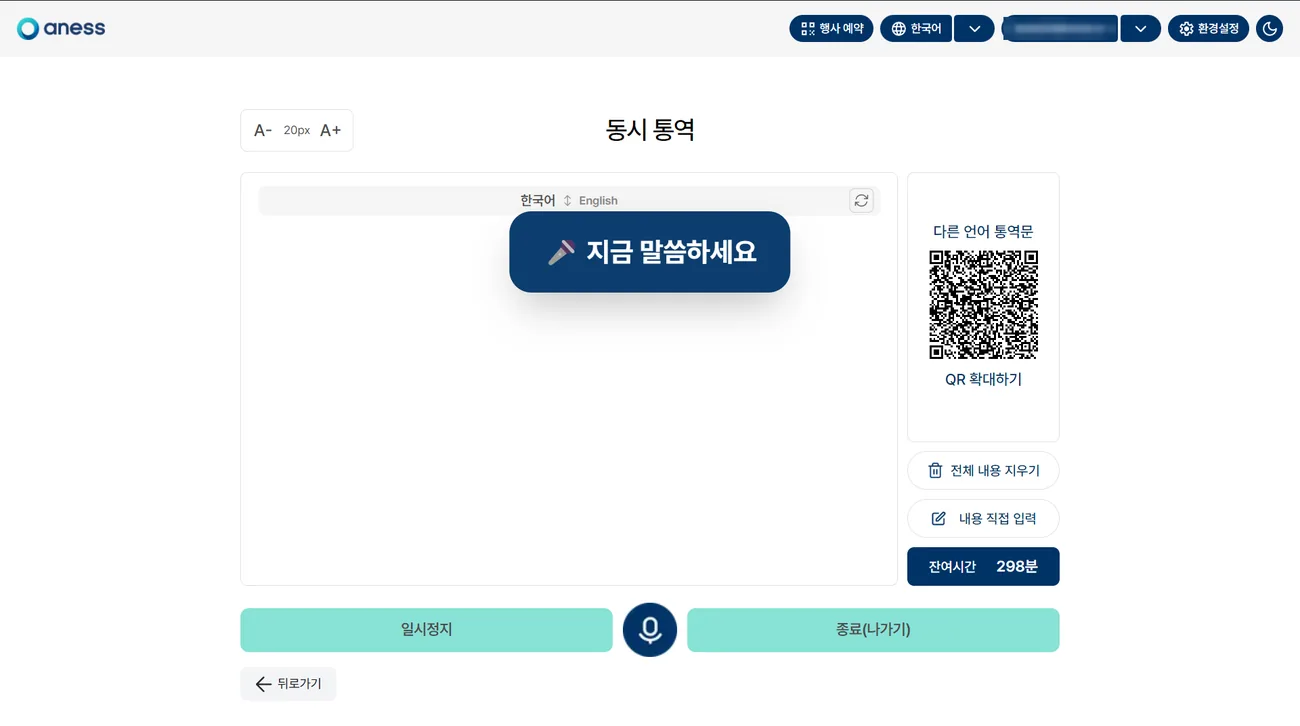 1234
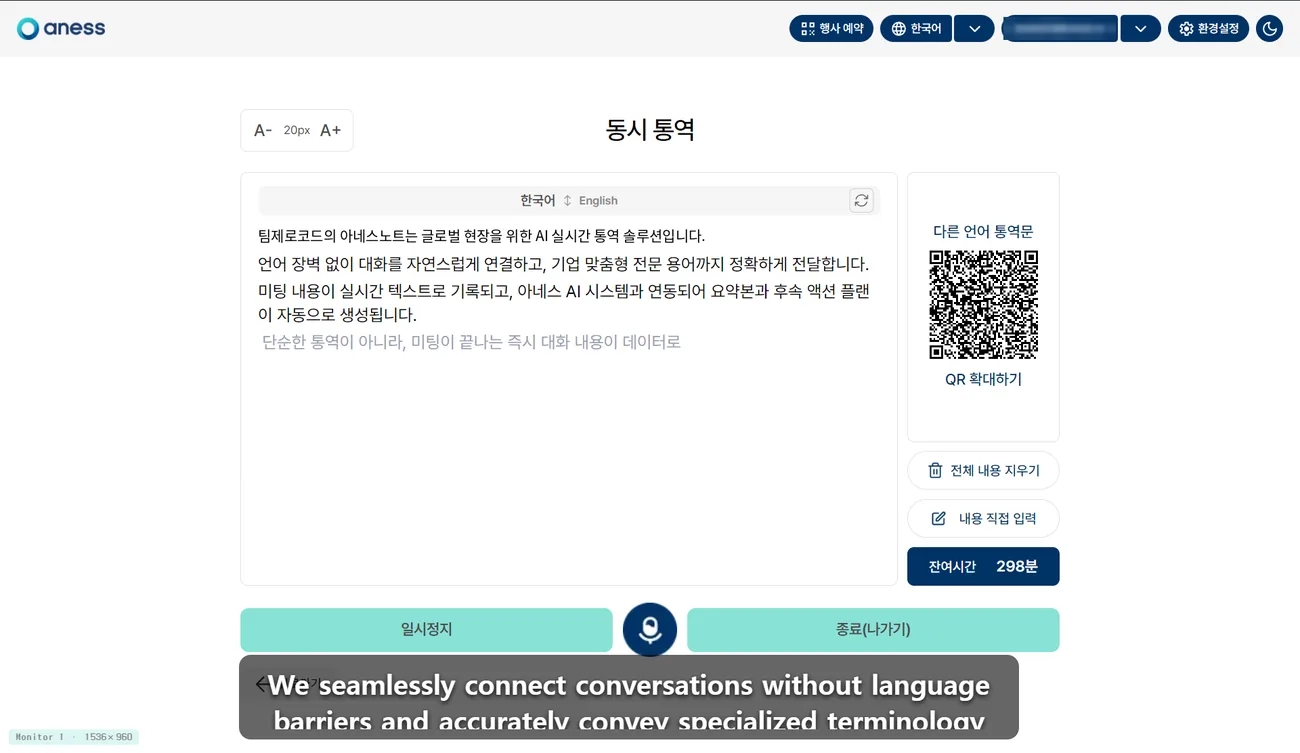 5
Subtitle settings and shortcuts
A mouse is awkward while you present — try each shortcut once during rehearsal.
- 1Text — subtitle font size. Drag the slider or press Alt + ↑ / Alt + ↓; Alt + 0 restores the default size.
- 2Opacity — how much the subtitle background covers your slides; Alt + T also cycles it.
Lower keeps the slide visible, higher makes the text stand out. - 3Cumulative mode — when ticked, past lines stay on screen and stack upwards.
Useful when latecomers need to catch up on what was said. - 4Display monitor — which screen shows the subtitles. The default is Default (current monitor); on a dual-monitor setup switch it to the venue screen.
- 5Moving the box and quitting — drag inside the subtitle box to move it and drag an edge to resize it.
You can also click a number field to type an exact value, and Ctrl + Shift + Q closes the subtitle overlay.
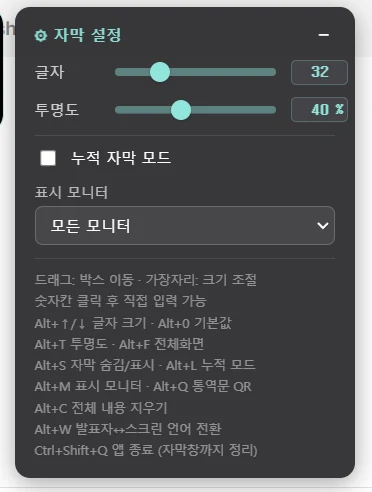 12345
All shortcuts
| Shortcut | What it does |
|---|---|
Alt + ↑ / Alt + ↓ | Subtitle font size |
Alt + 0 | Reset font size |
Alt + T | Subtitle background opacity |
Alt + F | Full-screen subtitles |
Alt + S | Hide or show subtitles |
Alt + L | Cumulative subtitle mode |
Alt + M | Switch the display monitor |
Alt + Q | Show the interpretation QR |
Alt + C | Clear everything on screen |
Alt + W | Swap speaker ↔ screen language |
Ctrl + Shift + Q | Quit the app (subtitle window too) |
Edit the live subtitles
When a line comes out wrong, fix it from backstage and the audience screen updates at once.
Open the live subtitle editor
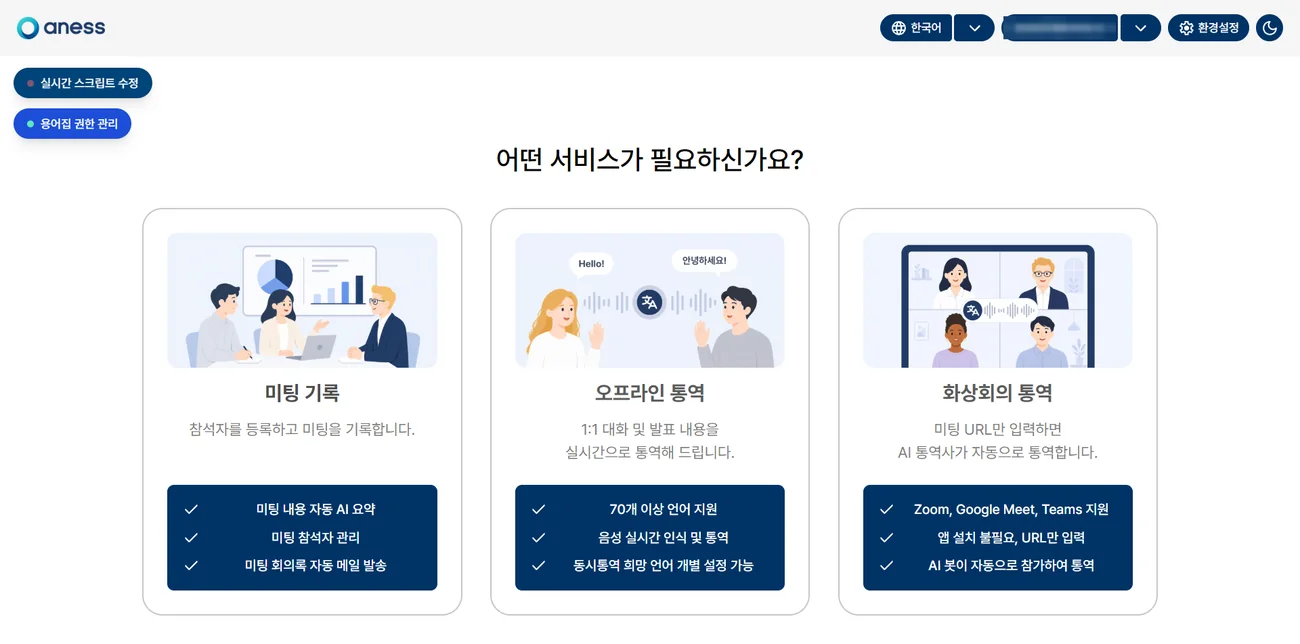
- 1Sign in to anessNote (note.aness.ai) — the [Edit live script] button sits at the top left of the screen. Click it.
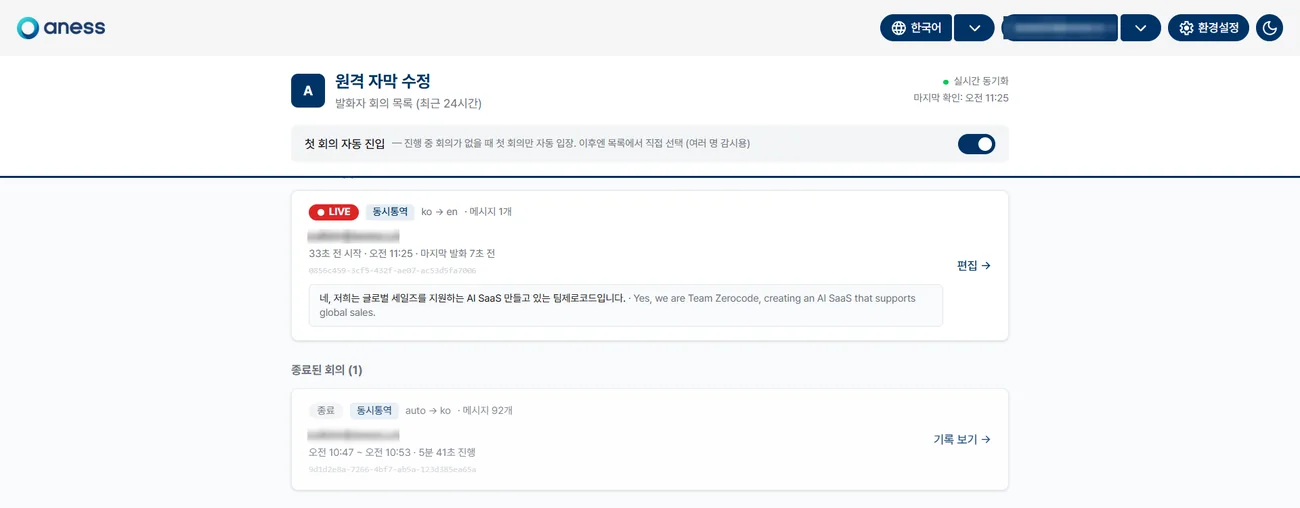
- 2The Remote subtitle editing page lists speaker sessions from the last 24 hours. A session in progress is marked [LIVE].
- 3Click [Edit →] on the session you want. Finished sessions open read-only via [View record →].
 1
 23
Turn it off and pick from the list when several people are monitoring together.
Check the transcript and fix a line
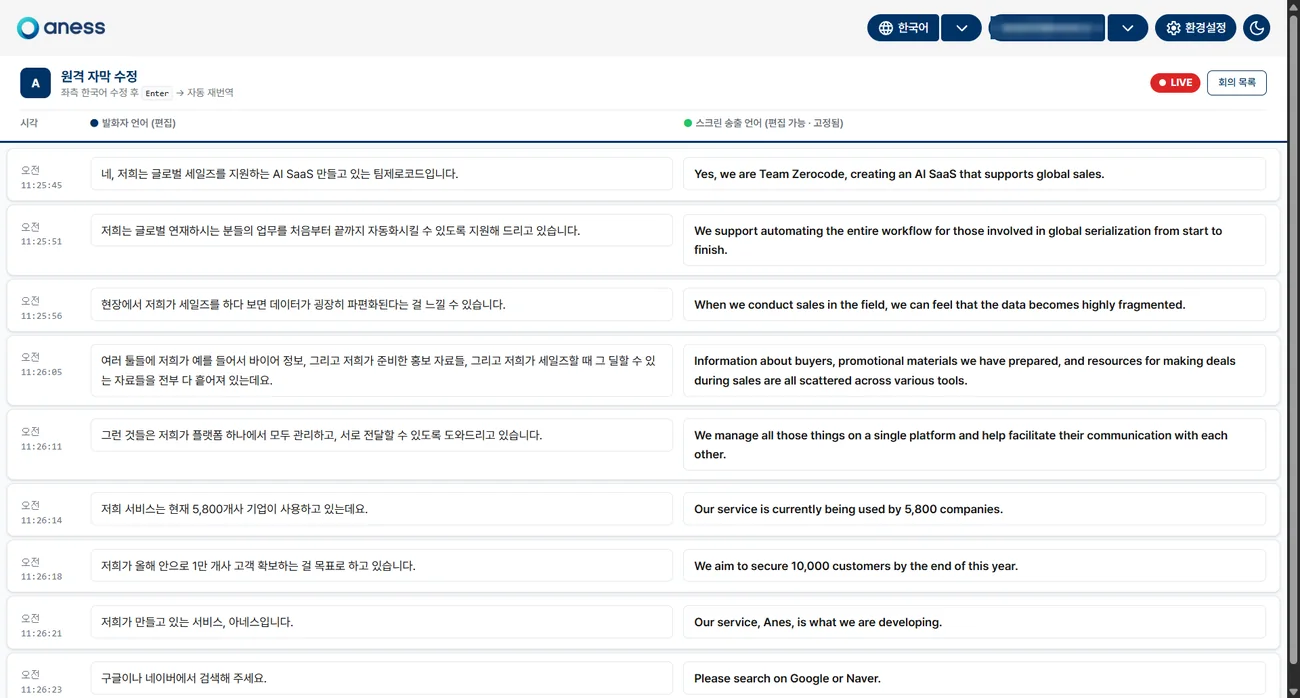
- 1Left — speaker language (editable) : the original lines build up in real time with timestamps. This is the column you edit.
- 2Right — screen output language (editable, fixed) : the translation that goes out to the audience screen and the QR page.
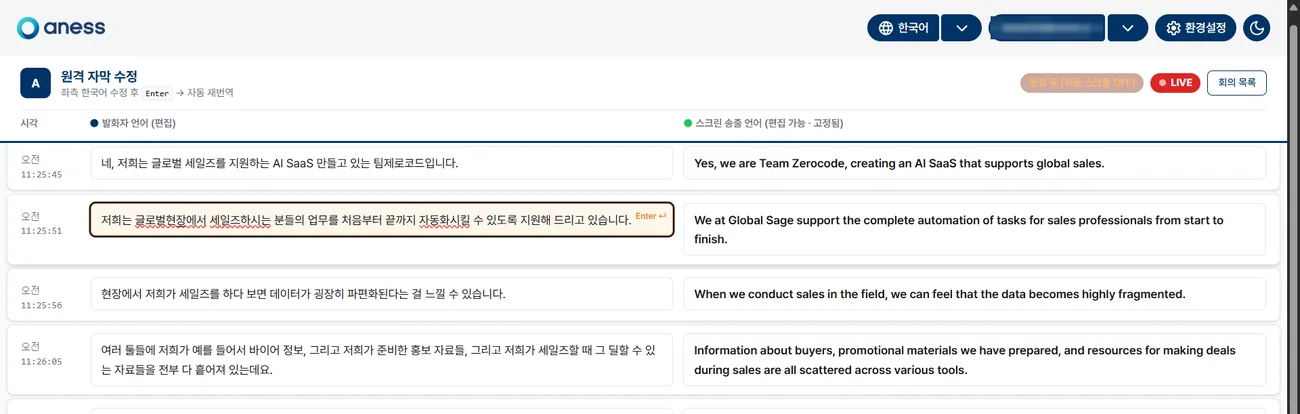
- 3Click the line that needs fixing, correct it and press Enter — it is re-translated and pushed to the audience screen immediately.
Touch only what is wrong; there is no need to pause the interpretation. - 4While you type, [Editing — auto-scroll OFF] appears at the top so the view stops jumping as new lines arrive.
Auto-scroll resumes when you finish.
 12
 34
If an operator backstage listens along and quietly fixes the slips, the audience never notices anything happened.
End the session and review the record
When you end the session, the transcript is saved to the anessAI dashboard automatically.
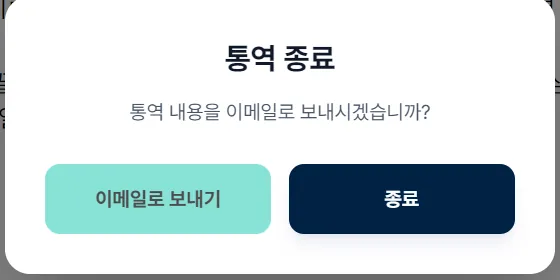
- 1Click [End] — a dialog asks whether to email the transcript.
- 2Choose [Send by email] or [End].
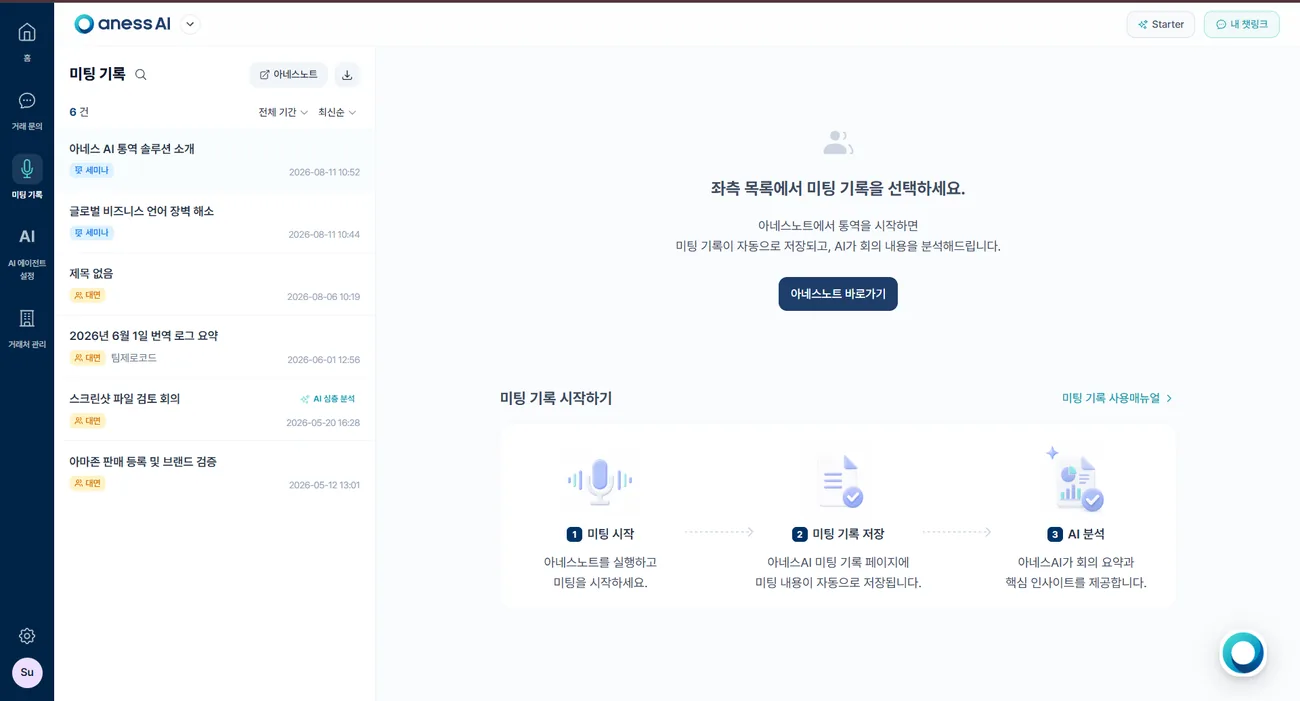
- 3The record appears under [Meeting Records] on the anessAI dashboard, tagged Seminar.
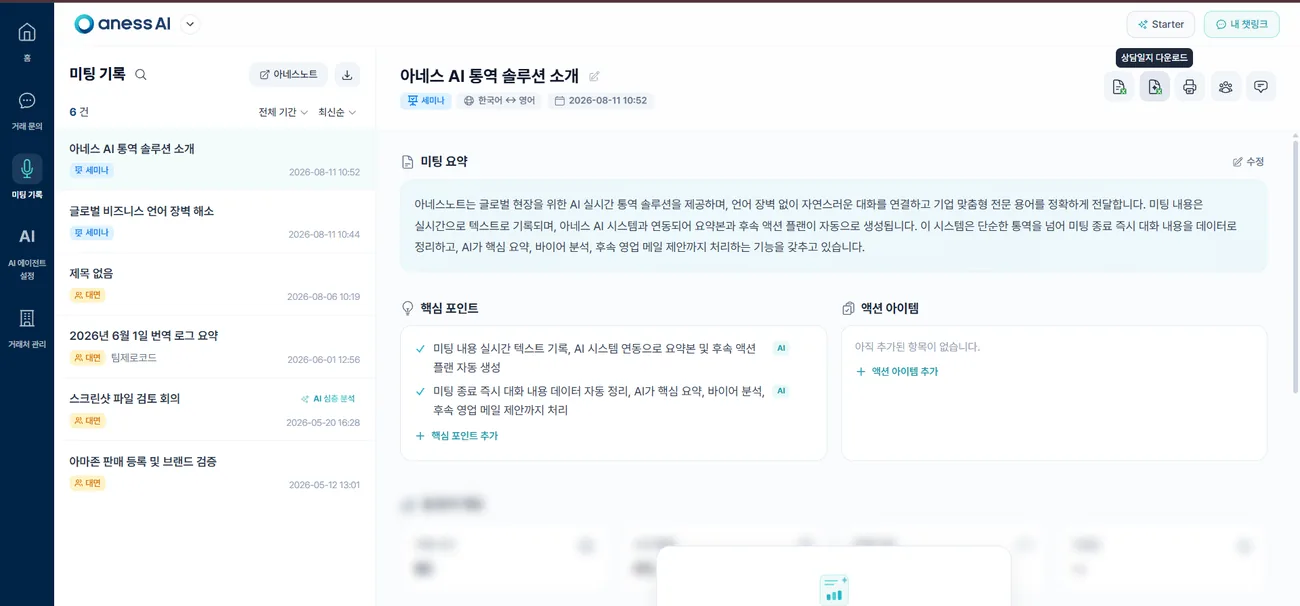
- 4Open it to see the summary, key points and action items, and download it with the icons at the top right.
 12
 3
 4