

Meeting Interpretation
Building a Glossary
Register company names, products and jargon in advance to sharpen the interpretation.
Based on the new UI, August 2026 · click any screenshot to enlarge.
※ Click any screenshot to enlarge.
1
Building a glossary — bulk upload from Excel
Registering company names, product names and industry terms in advance sharply improves accuracy.
Open the Glossary tab and get the template
- 1Go to [Settings] ▸ [Glossary].
- 2Under Bulk register with Excel, select at least two languages (e.g. Korean and English).
- 3Click [Download Template] — an Excel file matching your languages is saved (e.g. glossary_template_ko-en.xlsx).
- 4After filling in and saving the file, click [Upload Excel].
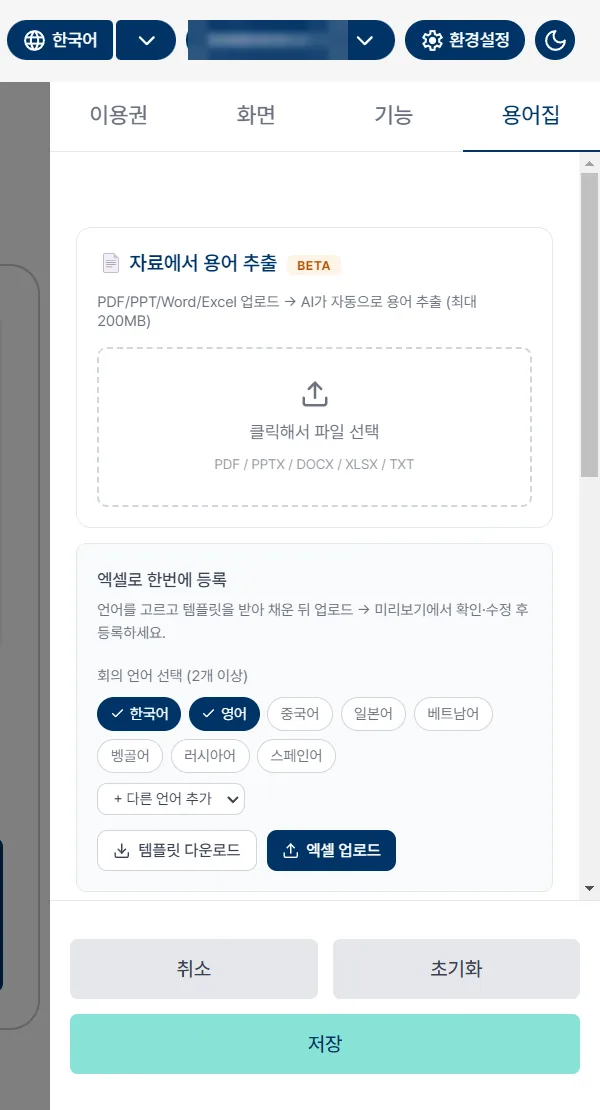
 1234
Fill in the template
- 1First row is guidance; grey rows are examples — delete them and type your own.
- 2Language columns — write the same term in each language.
- 3Abbreviation column — fill it only when an abbreviation exists (HR, MOU).
Once set, it is recognised in speech and shown as-is without translation.
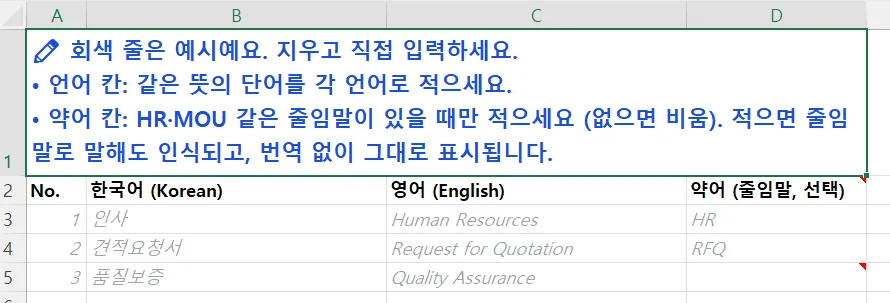 123
Register in anessAI (AI Agent Settings)
- 1Click [AI Agent Settings] in the left sidebar of the anessAI dashboard — the multilingual glossary opens.
- 2Use [+ Add term] to register terms one at a time.
- 3Use [Add language] to add more columns (Korean as the base, plus English, German, Japanese, Chinese, Vietnamese and Arabic).
- 4Check Total N / 1000 for how many terms you have registered against the limit.
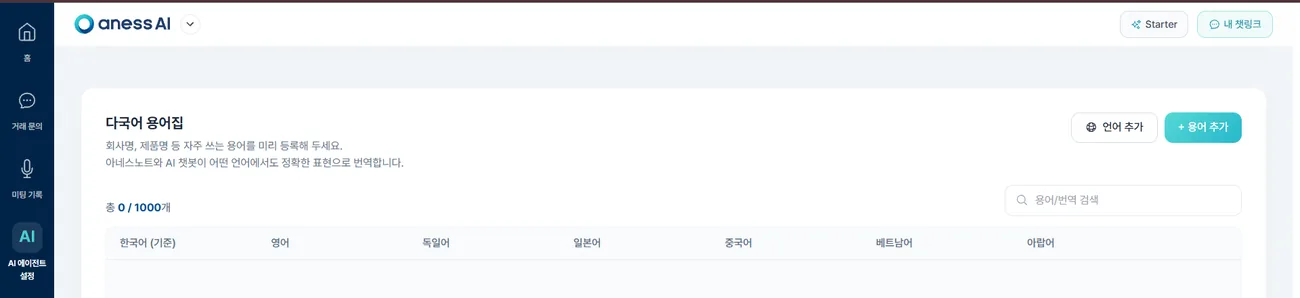 1234
NoteThe two glossaries serve different purposes. The one in anessNote [Settings ▸ Glossary] feeds live interpretation; the one in anessAI [AI Agent Settings] pre-trains the AI chatbot. Register terms in anessNote to improve interpretation accuracy, and in anessAI so the chatbot answers using your own vocabulary. Bulk upload from Excel is available in anessNote only; in anessAI you add terms one at a time.
Check the preview and save
- 1After uploading, a preview appears — review and edit before saving.
- 2Click [Register N] (e.g. [Register 3]).
- 3Click [Save] at the bottom — the glossary is applied only after saving.
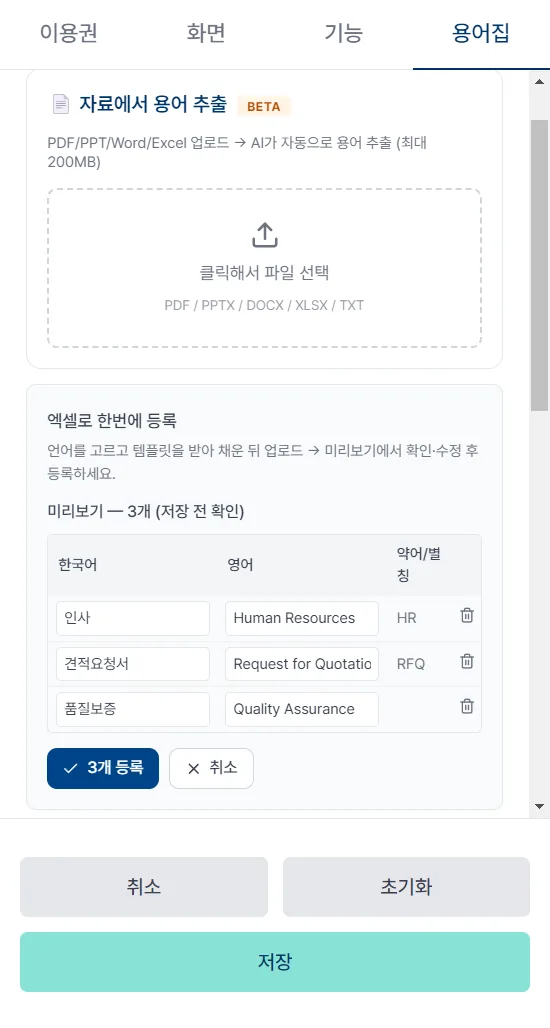 123
NoteExtract terms from a document (BETA) — upload a PDF, PPT, Word or Excel file (up to 200 MB) and AI pulls the terms out automatically. If you already have the event material, this is the fastest route.
2
Adding and managing terms individually
Use this to add a single term right before an event, or to edit and delete existing ones.
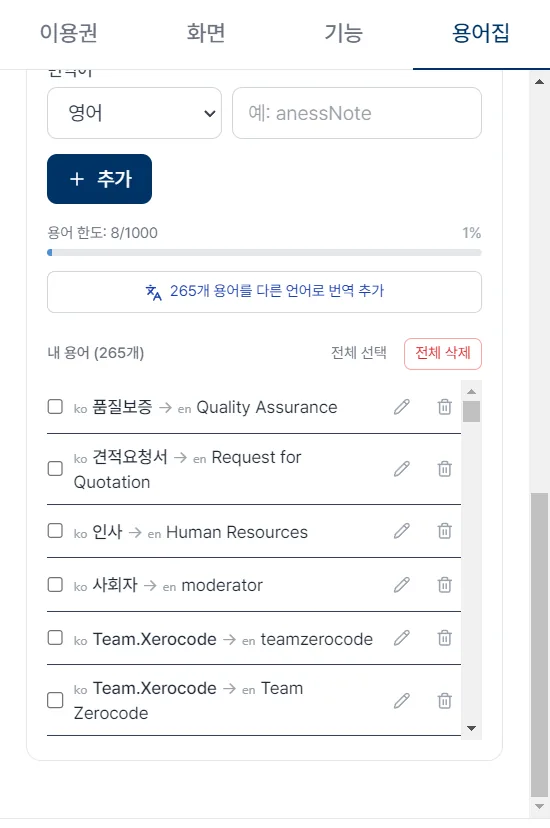
- 1Pick a language, type the term, then click [+ Add].
- 2Term limit — up to 1,000 terms per account.
- 3[Translate N terms into another language] — extends existing terms to another language in one go.
- 4My terms — edit (pencil) or delete (bin); use [Select all] and [Delete all] for bulk actions.
 1234
NoteThe glossary is stored per account and applies to offline, video and conference interpretation alike.